Rivet Setting / Perlage, Top 3 Mistakes To Avoid & What Tools You’ll Need To Start.
- Leathercraft Masterclass

- Jun 20, 2021
- 7 min read
Updated: Jul 20, 2021
I remember watching a documentary explaining how ships are held together - it was riveting!
Ok ok, I’m done with the rivet jokes!
In this blog post, I want to highlight some of the issues you may come across when installing locks and other hardware using small rivets. That way, you can avoid these costly mistakes which are all too common.
I will say right now, this blog post is not about copper rivets commonly seen in saddlery and rustic leather goods. What we are discussing here, is focusing on hardware installation for fine leathercraft projects such as bags, cases and projects of that nature.
So, let’s start by clearing up some common questions I get from my students about installing rivets.
Pins, nails and rivets oh my! But what’s the difference?
To put it simply, all nails can be rivets, but not all rivets can be nails. Understood?
Oh ok, let’s break it down.
A nail is a small metal rod with a head on one end (for driving under impact) and a point on the other end so that it can be driven easily through a specific material i.e. wood.
A pin is simply a small nail (such as the common brass escutcheon pin).
A rivet on the other hand, has a domed head on one side, but a flat blunt end on the other. It is designed to be pushed through a hole already made in two or more materials to be held together.
Once through, the blunt side of the rod is trimmed to size and domed over, permanently holding the parts together.

If you pushed a nail or small pin through your lock, leather and backing plate, then trimmed and domed it, that nail or small pin would now be called a rivet. It has simply been modified for a different use.
The process of doming a rivet is called… riveting. Perlage is what the process is called in French.
This process requires three tools: A metal hammer, a doming tool (also called a rivet setter) and a backing block.
Let's start with the backing block.
The backing block can be any material that is slightly softer than the rivet. This block goes underneath the lock/hardware and supports the head of the rivet as you are hammering the opposite side.
The block should deform slightly under impact, but without damaging the head of the rivet.

If the block is too hard, you will develop a flat spot on the rivet head, too soft and the block absorbs too much energy and you can end up with a gap between the rivet head and the lock face when you’re done (a difficult fix!).

So here's a quick hardness cheat sheet for you:
Your rivet is made from Stainless Steel, use Nickel as a backing block.
Your rivet is made from Bronze, use Brass as a backing block.
Your rivet is made from Brass, use Aluminium or copper as a backing block.
Your rivet is made from Aluminium, use Copper or Zinc as a backing block.
Your rivet is made from Copper, use Zinc or Delrin (hard plastic) as a backing block.
Your rivet is made from Zinc, use a Teddy bear 🧸 as a backing block 😋.
This is simply a rough guide since some of these metals can share a similar hardness. For example, a soft annealed brass rivet can deform against certain hard aluminium alloys.
So you need to test your block with a sacrificial rivet to ensure you have enough support and the rivet head doesn’t deform under impact.
Several blocks made from various metals are a good investment for your workshop.
Backing blocks (also called jewellers doming blocks) can be found on eBay or Amazon. Usually for use in jewellery making. Prepare your block by sanding the edges/corners prior to use which will prevent marking your leather.
Do this on both sides in case you use it upside down (or when one side becomes unusable through heavy use).
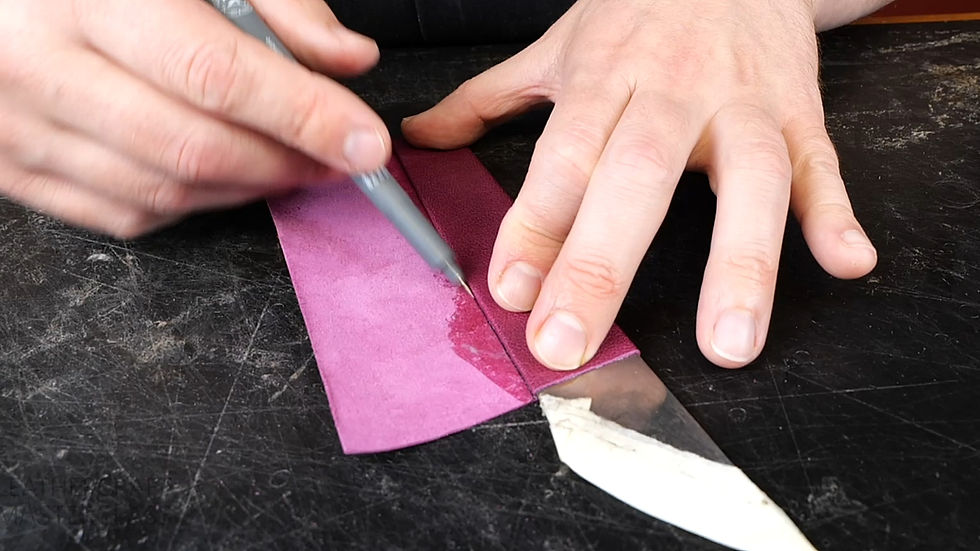
The next tool you need, is a rivet setter. This tool looks a bit like a pen since it tapers towards one end.
At the very point, you will find a concave cut-out (bowl shape) which is usually polished. As you strike your rivet after trimming, it will impart a convex polished head (a dome).

Tools designed specifically for setting rivets are not very common. They are also expensive (as all specialist tools tend to be!).
These tools can be a good investment if you have the cash to spare and you are short on time.
However, in the next Masterclass video course (released 8th July 2021), I will go in depth to explain how you can make a rivet setter yourself using inexpensive tools you can purchase in most hardware stores or online.
The great thing about making your own tool is that you can custom design the size and also how much of a convex dome shape is imparted onto your rivet.
Lastly, we have the hammer. Ideally this should have a metal head since most plastic hammers such as nylon won’t provide enough energy to properly dome a metal rivet.
If you want to keep your rivet setter in good condition, use an 8 or 12oz brass mallet like I do. Softer metal mallets (brass/copper) designed for the automotive industry work perfectly for this. They provide good impact energy whilst not damaging your steel tools (including pricking irons!).

So, let’s go through the most common mistakes seen in decorative riveting:
Mistake #1: Plated rivets.
My pet hate is plated rivets. An example is where a base metal is used such as steel, then it is brass plated for decoration (also known as ‘brassed’). This keeps the cost down as solid brass rivets can cost several times more.
The first issue is that plating never lasts very long (ever experienced plated jewellery?). Scratches or wear over time rub away the microns thin plating exposing the base metal underneath.
In the case of steel, this will oxidise into dark grey, or worse, rust!
Higher end rivets are usually made from solid brass since they don’t rust, but when plated with gold, nickel or palladium, the brass will eventually be exposed in much the same way. This can create a mismatch with the hardware if it is a different colour.

The second issue is, the rear of the rivet where you need to trim it to length before doming. This necessary process immediately exposes the base metal.
So while your nickel plated brass rivet has a nice silver colour at the front, it will be a deep gold colour at the rear - which will eventually darken as a patina develops. There is little you can do about that unfortunately.

Your best bet is to use an un-plated rivet where the metal matches your hardware/lock. For brass hardware use brass rivets.
For silver coloured hardware, (nickel, zamac or stainless steel) use silver coloured rivets made from un-plated metals such as stainless steel, monel, nickel-silver, or aluminium.
Choice is based on durability, it’s intended use (i.e. rivets for hinges vs retaining a lock) colour matching your hardware, and your ability to work with a given hardness. Softer metals are much easier to rivet.

Mistake #2: Slipping with your rivet setter.
This is a crying shame when it happens, especially when it’s the last rivet you are setting. Removing a fixed rivet requires skill, burrs, tape, a Dremel tool and plenty of luck on your side!
When you slip, or your setter bounces into the wrong position, you can leave a ring mark on your rivet, or indeed the hardware you are riveting. Often you slip right as your hammer strikes.

This can be avoided in two ways:
Always keep down pressure with your rivet setter onto your rivet. Keeping pressure reduces the chance of your setter moving out of position as you strike.
Use a stable surface that is firm. Some parts of your workshop table are more prone to bouncing issues than others. So place your doming block directly over the table leg area. A lightweight table that is hollow or made from chipboard also causes bouncing issues. So bye bye Ikea Tärendö!
Mistake #2: Lack of knowledge and practice.
‘The time to discover how to set a rivet, isn’t when you need to set a rivet.’
- Leathercraft Masterclass 2021 (quote t-shirts coming soon.. ;)
Let’s be frank, most of the hardware and locks we use in fine leathercraft aren’t exactly cheap.
It would be similar to taking on your first leather project using premium leather, then learning how to saddle stitch at the same time. Most people wisely learn to stitch on small pieces of leather first.
With that said, in the next video course ‘How To Install Locks And Decorative Rivets’ (release date 8th July 2021) I will be showing you in great detail 3 separate methods of rivet installation. This means you can try all three methods and settle on the technique that gives you the most confidence and precision.
I will also show you how to make your own rivet practice bar, which simulates very closely the challenges of riveting leather between two flat pieces of metal.
I even encourage you to purposely make mistakes, which means you will be able to recognise what it feels like when something goes wrong - and rectify it!
This fun practice session will have you setting as many rivets as it takes to build your confidence, so that you are ready to take on any bag or case lock.
By the end of it, you will have the confidence and the ability to set rivets as good or better than the top luxury leather brands.
Practice makes perfect, so I hope I have hammered the point home! (sorry, too easy).
Talking of tools and leather, have you claimed your FREE tool buyers guide and the leather selection guide yet?
The 'Tool Buyers Guide' was created just for you and will highlight everything you need to get started (it's not just for beginners though..).
If you’re not one of the thousands of fellow crafters who is already benefiting from the FREE guides, click the link below, enter your email and I'll send them to you immediately:
P.S. In the guides, you will find all my recommendations for beginner, intermediate and advanced crafters. This means you can get just what you need and avoid spending money what you don't need! (Unless you have a tool buying addiction, in which case I feel your pain. Stay strong! ✊).

Metal locks don't create such problems as a locksmith i have experienced it many times working on these locks.
Very well done Phillip. Such an absolute professional. Excellent tutorial - great pictures. Thank You for always giving it 100%
Will one of the rivet-setting methods be the peening/doming of the cut stem of an escutcheon pin, something along the lines of installing an Abbey Saddlery Liston lock?