Leathercraft Kits And 5 Other Easy Mistakes To Avoid!
- Leathercraft Masterclass

- Dec 19, 2021
- 7 min read
Updated: Aug 2, 2024
When you are new to a hobby like leathercraft, it can be a very exciting time. Your eyes widen and your brain begins to absorb new words, phrases, tools and leather techniques like a sponge.
But it’s easy to go down the wrong path and end up spending time and hard earned money on things that just don’t add any value to you, or your quest to create your own quality leather goods.
Therefore this blog aims to help you avoid many of the frustrating pitfalls that you are likely to come across in the beginning, and for many, months, even years after you get started!
1. Cheap Leathercraft kits.
As mentioned in the title, offering leathercraft kits is a no brainer for many brands supplying tools, equipment and leather to the hobby industry. After all it’s easy money taken from the uninitiated.
Suppliers know that people are unlikely to buy a kit with high quality tools costing several hundred £/$/€.
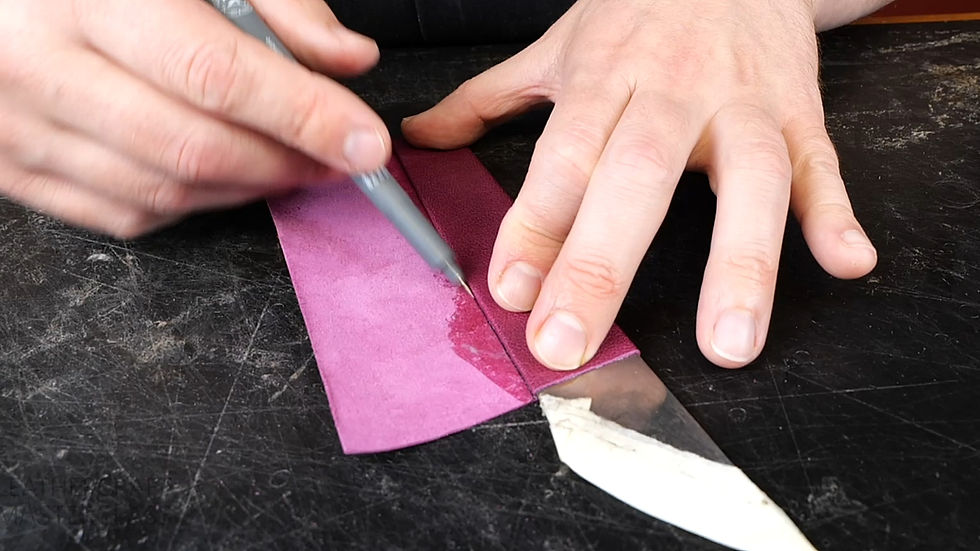
So, many of the kits tend to keep the tools, thread and leather firmly in the budget end of the quality spectrum. The difficulty with really cheap tools is the poor edges applied at the factory (no hand finishing here!).
Some of the kits I have seen on offer are absolutely horrendous, and would likely put off anyone new to the craft for life.
It takes a professional to make use of poor quality tools (not that they would want to), and a beginner would have little chance of any success with them.
For a new crafter, it’s a case of ‘less but better’ (which also applies to wine, friends, cigars and relationships too #lifehack).
I remember buying a kit as a brand new crafter many years ago. One of the leather skivers supplied was completely useless even though a pack of fresh blades was provided. I got so mad at it, I ended up throwing it into the bushes in complete frustration.
Years later I saw the same leather skiver at my local pharmacy in the 'foot health' section. Turns out it wasn't a skiver, rather a foot callus removal tool (keep this story between you and me please..).

Tool acquisition is a slow process that can take time as your skills and needs develop, so buying a box of cheap tools, although tempting, will not set you on the right path.
2. Overly fixated on detail, or forgetting it altogether.
Over the years I have spent teaching this craft, I have noticed the prevalence of two distinct personality types in leathercraft. They are the creatives, and the methodical/analytical crowd. Some would describe these types as right brain or left brain dominant.

Creatives tend to focus on the project as a whole, it’s design, function and aesthetics. They like to take everything they learn and modify it to their own liking (rarely do they follow instructions to an exact!).
They mostly learn through experimenting and jumping into the deep end of projects without over thinking the plan or the process too much. Intuition will fill in any blanks.
All the new and wonderful designs you see from individual artisans or famous brands come from these types.
Their comfort zone is the ‘unknown’, the untested or new. Sticking to a plan or strictly following a guide is simply too boring and uncomfortable.
However, they do tend to generate the most problems for themselves, and they also have the most unfinished projects sitting on the shelf. Likely they got distracted, sorry, 'inspired' by a squirrel and decided to start a different project on a whim.
Creatives also have the mindset of sacrificing details. Mistakes can simply be explained as evidence of ‘handmade’ and each piece being ‘unique’. Other creatives may buy into that, but not these next guys, oh no!
The methodical/ analytical crowd are the masters of detail. To them design, colour, or the look isn’t as important as making sure that corner stitch isn’t out of alignment on the edge of their wallet, or else the project is ruined and more testing must be conducted before advancing.
The ‘left brain’ crowd are the most likely to spend time comparing 5 different types of solvent free contact adhesive and measuring the shear strength of each (don’t worry, the numbers are logged neatly in an excel spreadsheet for future reference), rather than spending that time actually making something and gaining experience.
The most painfully neat and tidy work will be produced by these crafters. The neatest stitches, the shiniest edges, the most flawless cuts of leather - nothing, and I mean nothing, is overlooked.
They tend to stick to what they know, since this is their comfort zone. The known, the familiar.
They appreciate the design of creatives, but they know how to make it better, and they will.
Left brainers are the most likely to create a direct copy of someone else’s work (usually without malicious intent), a famous brand's product, or follow a pattern without deviation.
They are not generally open to creativity, and a known entity (something that’s already been created by someone else) is logical, since there is evidence that the design works and functions well. To the analytical, this just makes plain sense.
So, did you identify any of your own personality traits in the above examples? It’s likely that you are not all creative, or not all methodical. Many of us are a combination of the two, leaning slightly one way or the other, sometimes even switching between the two.
Now, how can you improve your work if you fall mostly into one category? You may have already noticed me talking about ‘comfort zones’.
Since most of life’s growth happens outside of your comfort zone (the zone of chaos vs order for all you J.P. fans), it makes sense to spend time involved in activities that you don’t normally pursue by choice.
For creatives, that may mean spending time practicing and perfecting the fundamental skills of leathercraft such as hand stitching, edge finishing and skiving etc.
For the methodical, this means your best growth would be seen designing and prototyping your own products and coming up with something completely new (and likely highly detailed!). The more you work on your weaknesses, the better the overall leatherworker you will become.
3. Incorrect workshop setup
This is never discussed enough within the general leathercraft community in my opinion. It’s not particularly sexy, but the results can be!

Comfort is paramount when you want to create your best work, and this is frequently overlooked.
Are you comfortable as you stand and cut out your patterns? Do you ache as you stitch? How’s your upper back and neck after a full day of crafting?
Back to comfort basics:
The cornerstone of any workshop is the worktable. Ideally this should be elbow height when elbows are bent 90 degrees with relaxed shoulders. Calculate this measurement while wearing shoes, with a cutting surface on the table and a mat to stand on.
Talking of a mat, this isn’t just to save your floor from dye, glue or paint, nor is it simply saving your bladed tools from damage if it's (when it's) dropped accidentally. One of the main benefits is your foot comfort while you stand.
A rug or a hallway runner can be all you need, just remember to tape down the edges and corners to prevent you or someone else tripping. For hard floors, anti-fatigue mats may be a better choice.
The chair that you sit on for stitching using saddlers clams should also be a place of comfort. Ideally you want the height to be at a point where the tops of your thighs are parallel to the floor or slightly higher. The chair should feature back support, but not arm rests.
A stool is also a viable option as long as it provides a footrest to bring your thighs up. This is a better option if you have long clams but not long legs!
4. Bad lighting
In the beginning I underestimated the importance of good lighting. Not just for photography, but for the crafting experience.
Many times I would be in my workshop using a colouring agent such as leather dye or edge paint. But when outside in the sunlight I would notice a slightly different colour.
My theory was as long as the light was bright enough, I would be good to go. Silly Phil.
After a while I discovered high CRI (colour rendering index) lighting which changed the game for colour matching or dying in general.
You can’t always rely on an outside light source as sunrise/sunset can be too warm, night time provides no light, and overcast days can make colours seem dull. (welcome to winter in England).

So lightning that is bright enough, sufficiently diffused (no spotlights), and coming from multiple angles will be greatly improved with high CRI (90+) bulbs. Either LED or fluorescent. If you want to be picky, go for 5000 - 5500 Kelvin (colour temperature).
5. Poor quality leather
Without all doubt, after technical knowledge, good quality leather is going to make the biggest difference to the outcome and the quality of the leatherwork you produce.
I remember when I first started out, I went to a hobby store (Michael’s) and purchased a zip lock bag of leather off-cuts.
I wanted to wrap the handle of my Maglite flashlight (torch). I lived in Canada at the time and a metal body flashlight really makes your hands cold when the temperature is double figures below zero - even with gloves on.
I selected a really nice piece of brown leather that had a lovely grain pattern to it. I folded over the ends of the wrap, then using a ruler for reference I made holes down each side of the seam using a 3’’ nail and a hammer (laugh it up!).
I selected some bow string (I used to make my own English longbows at the time), and began stitching the handle wrap together.
After a few stitches I noticed that I was starting to tear through the leather rather easily and I had completely ruined the handle wrap.
The next day I found a leather store a few miles away and took the leather in to show the owner (my future mentor!) what had happened.
He smiled and explained that I had used bonded leather, which is made of leather particles bonded together with a fake plastic grain over the top. Likely scraps from the upholstery industry making ‘leather’ couches.
He told me that I would need some vegetable tanned leather and a set of stitching irons for what I wanted to achieve - and he was right! I used what I bought soon after and it worked just as he said it would.
Up until that point I didn’t really know different types of leather existed, I just never thought about it all that much.
To this day I am borderline obsessed with selecting the best quality leathers and skins to pair with the right project, a skill in itself.
Thanks for reading! Comment below if you have any tips you'd like to share too.
Philip

The callus remover was one I bought early on too. That thing was a joke. Lol. Hopefully this blog saves someone time and money in the future.
I think I bought that same kit.